Silverlight Applications with J2EE Backend - Part One
If you have not heard, Silverlight is the latest rich client technology from Microsoft. The good thing about it is that it works almost on all browsers and operating systems and you can host your application on non-Microsoft stack too, but there are things such as database connectivity that you can’t benefit from when creating Silverlight applications. The only way to create data-driven applications would be to use a service backend. Here I’ll show you how to create a J2EE backend for your Silverlight application and host it on a JBoss application server.
To create the backend for the Silverlight application, I’ll show you how you can use J2EE technology which provides rich infrastructure for your backend. I’ll be using JBoss 4.2.3 GA application server to run this sample, and IntelliJ IDEA 9.0 Enterprise to develop the backend. IntelliJ IDEA Enterprise is not a free IDE (there’s a free Community version), but using it is natural for .NET developers having experience with Resharper addin tool for Visual Studio .NET. Of course, both tools are from the same company, but if you use Resharper with IntelliJ shortcuts most of them work in IntelliJ IDEA too. You can get a trial version from here for this experiment if you’re an experienced java developer, you can still use your favorite IDE.
This post is intended for .NET developers with (almost) no experience with Java language. If you’re familiar with NHiberanate, theoretically you should be able to use JPA in no time because of a lot API similarities: JPA provides APIs that are very familiar with (N)Hiberante.
Project Structure
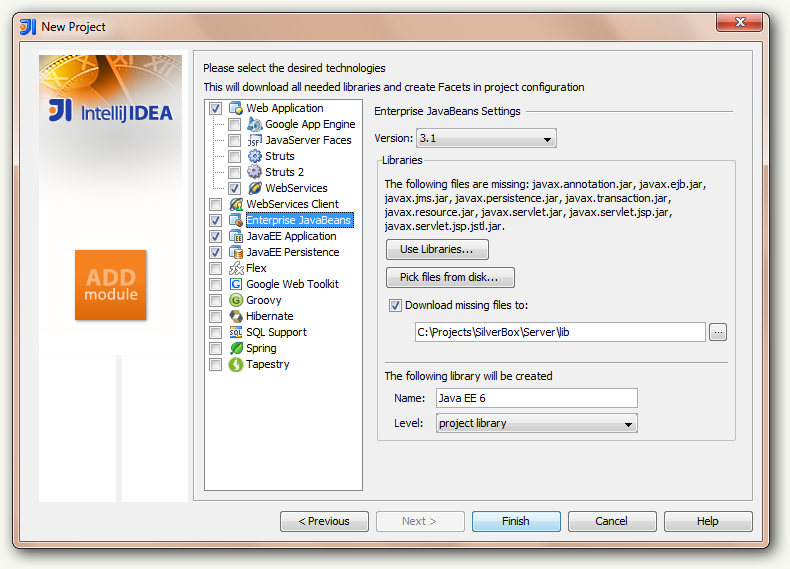
For our backend we’ll use a standard J2EE project, with support for JPA, JAXWS WebServices and other J2EE services. Fire up your IntellliJ IDEA and create a new project. In the project wizard, select Java Module and set path for your project sources. From the technologies page in the wizard, select JavaEE Persistence, Enterprise JavaBeans, JavaEE Application and WebServices. The wizard will download the JAR filles and libraries that are necessary from JetBrain’s website and set the project structure for you. Before we’re done with the project structure, we need to do some modifications.

Thanks to EJB 3.0 and its annotation-based EJBs no xml configuration would be necessary, so open ejb-jar.xml file and remove its content (enterprise-beans tag and its content). This file is in META-INF folder in the root of the project. Then open the persistence.xml from META-INF folder under the src folder and setup the persistence API.
Note: If you have hard time finding any class or file use the same shortcut as in Resharper (CTRL+SHIFT+N for files and CTRL+N for classes and interfaces).
This file is almost like hibernate configuration file so most of the content should be self explanatory:
1 |
|
Other than database configuration, notice the jta-data-source tag which points to a specified datasource name. We’ll learn about this in a bit.
IntelliJ Enterprise integrates with most of the application servers, including JBoss. First make sure you have a working version of JBoss application server which you can download from here. Open the Settings menu (CTRL+ALT+S) and from the Application Servers add a new JBoss Server and select the folder where you unzipped the JBoss package. Then in IntelliJ open the Edit Configurations submenu from Run menu and add a local JBoss Server. The already added JBoss server will be added. Select the default Server Instance. Notice the warning message in the dialog that says Warning: No artifacts marked for deployment.

Your applications may contain libraries, compiled binaries, services, etc. all will be packaged in a deployable unit. The standard deployment unit in Java is JAR (java archive) but other packages exists, namingly WAR (web archive) and SAR (service archive). All the mentioned packages can be packed and deployed in a single deployment unit named EAR (enterprise archive) file.
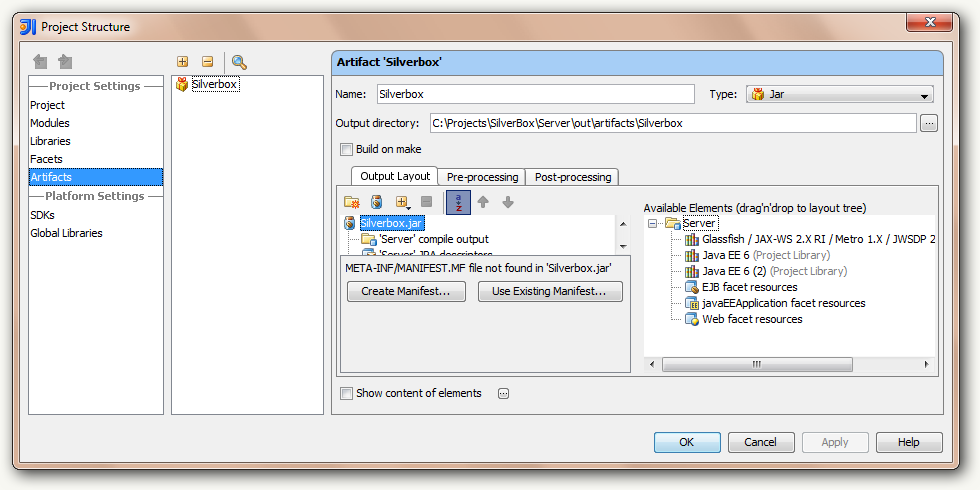
To specify what should be contained in the deployable package, we need to specify the deployment artifacts. To do this, go to Project Structure dialog (CTRL+ALT+SHIFT+S) and select the Artifact from the side list. Add a new artifact by pressing + button. Enter a name for your artifact and select the JavaEE Application: Exploded as the type. From the Output Layout add the Module Output and a JPA Descriptors. From the bottom of the page, click Create Manifest button to create an empty manifest in your src\META-INF folder.
Open up the Project Structure dialog again and check the Build Artifacts… check mark and from the dialog select the artifact name you’ve just created.
The project structure is almost ready. Now let’s add some code.
Create Enterprise Beans
Under the src folder create two packages (a.k.a namespaces). I’ve named the packages as silverbox.common and silverbox.services. I will separate the service interfaces and implementation in separate folders. To create a basic loopback service create the following interface in the common package:
1 | package silverbox.common; |
…and create the implementation in the “services” folder:
1 | package silverbox.services; |
Each EJB can be used locally or remotely so different annotations are required based on usage context. Since we need to only expose the EJBs as a service, we’ve only specified it to be a Remote service / interface.
Final step would be to expose the EJB as a Webservice. That is as easy as adding an annotation to our service implementation:
1 |
|
Data Sources
Before we deploy and run the application, we need to setup the datasource specified as jta-data-source in our persistence.xml file. JBoss when ran searches the deploy folder for the specified datasource. Datasource file names are ended with ds suffix by convention. The datasource file contains connection information that will be used in our application. Here the jndi-name is important and it should be the same thing as what we’ve specified in persistence.xml file. To use MS-SQL 2005 database create the following file and copy the file in the deploy folder of the JBoss. You can create an ANT script and automatically copy this file into the destination folder, if you prefer.
1 |
|
Deployment
We’re almost there now. From the main toolbar, click the Run button to fire up the JBoss server. Notice the logs that appear in Output window of the IntelliJ IDEA. If you see that artifact is deployed successfully, you’re good. Fire up your browser and enter the services url to see the automatically generated WSDL. The deployed URL would be http://localhost:8080/Silverbox/LoopbackService?WSDL but if you’ve named your artifact and service something different it is in the format of http://jbossmachine:port/artifactname/Servicename (you can also see the registered Endpoint in the output window).
Next we’ll see how to extend the service and create a Silverlight client that accesses our backend. Get the source files for this part from here.