Silverlight Applications with J2EE Backend - Part Two
In previous post, we saw how easy it is to use J2EE as a rich backend. Let’s continue with our example and show how to fetch and send some data from our J2EE backend to a Silverlight rich client application. Let’s continue our work using a simple Blog domain model.

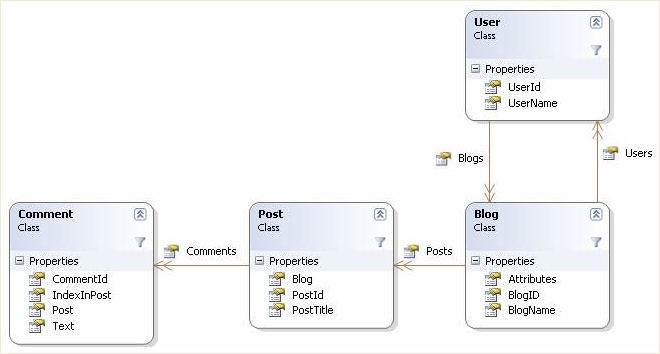
To create our simple domain model, let’s create the domain classes in java and let JPA create the database for us. For .NET developers familiar with NHibernate and NHibernate Mapping Attributes project, when comparing this to .NET coding style, there should be nothing new here. Here’s a piece of code:
1 | package ir.silverbox.domain; |
Let’s create a service to return a list of all available Posts and display them on our Silverlight client. Continuing from previous post, you’ve already learned how to create services (or SessionBeans as called in EJB context) but when you actually have an entity model and want to expose it through service, you’d better think twice. There are a lot of things that can go wrong if you do so:
- Your change in domain model will ripple to your clients because of changes in service contract and will probably break all your clients.
- Your domain model might contain sensitive information which is best kept on your service tier.
- Other technical stuff such as your entities beiing lazy and having problems with serialization process.
So before continuing, let’s create some DTO objects which will be sent across the service boundary. For this sample, a POJO class resembling your existing Post entity would suffice. To map between Entities and DTOs, you can roll your own mapper classes.
1 | package ir.silverbox.common; |
Did you notice the EntityManager? It is injected automatically by EJB container and the good thing is you can inject other services, even your other EJB session beans too. EntityManager provides functionalities similar to ISession in N/Hiberante such as CreateQuery, Find, Attach/Detach, Flush, etc.
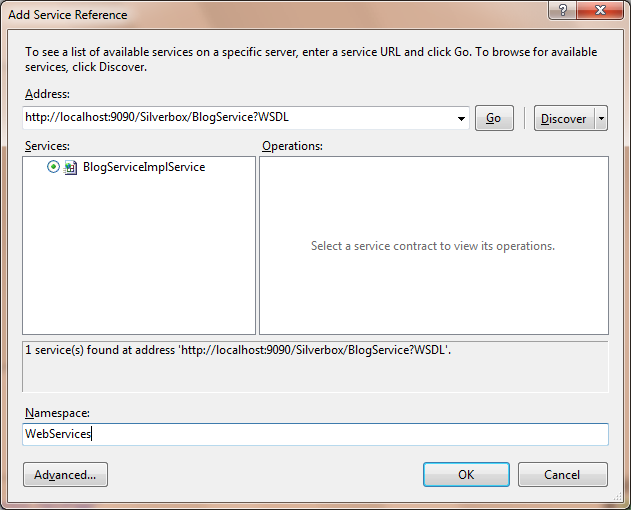
Now let’s create a new Silverlight application and add a new Service Reference to your project which points to our new service at:
http://localhost:9090/Silverbox/BlogService?WSDL
Use IP / Port of your JBoss server, port is usually 8080. Mind the small / caps characters.
If you open the proxy sources which is automatically generated, you’ll notice our DTO objects are all here in our Silverlight application now! There’s a slight modification though: All the classes and properties are named according to java naming conventions so our PostDto class is now named “postDto” on the Silverlight client. This is happened to all the properties of the proxy classes too so if you’re binding generated classes directly to your UI keep in mind that Xaml binding are case sensitive. What is good is that INotifyPropertyChange is already implemented. The rest is just regular Silverlight application calling a remote service:
1 | <Grid x:Name="LayoutRoot"> |
and to call the service:
1 | private void MainPage_Loaded(object sender, RoutedEventArgs e) |
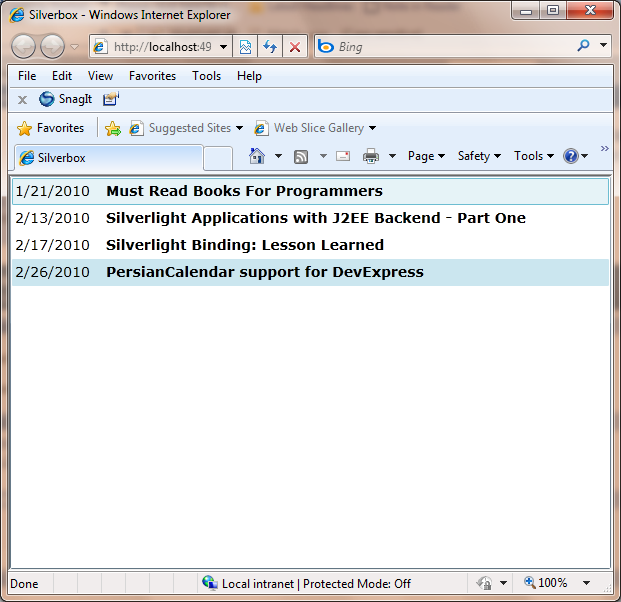
You should have a rich application that is bound to your database using your service layer on J2EE. Pretty easy so far, don’t you think?

Next post in this serie will show you how to handle business validation using SoapFaults, how to serialize Java exceptions into Silverlight client and how to actually deploy the whole application. Get the sources of this part from here.